
On Saturday afternoon, I finished the floor in the back hallway and stairs. I've been getting lots of questions about how I did it, so I'll share my secrets with you. ;-)
I did it the easy way, which is to say it was the least expensive and least time consuming way I could find. If I were picking a floor to have for 30 years, I wouldn't do it this way. But I need a floor we can afford for now...that will last in the meantime...so this is what I did!
After doing a bunch of online research, I decided to lay vinyl tile. And because I knew I'd want to do it really quickly, I decided to lay self-adhesive vinyl tile (so that I wouldn't have to do that extra step of gluing it down).
I didn't want to go to the store and buy the tile (since I knew I'd be by myself with the kids and the boxes of tiles are heavy). So, I searched on Amazon for someone who would deliver them to my door for free. Gotta love free shipping. I ordered these tiles, but if you search for "vinyl tile" or "self-adhesive vinyl tile" on Amazon, you will find lots of colors and options.
All you do is peel and stick. Easy-peasy.

I just made sure the floor was clean, and that there weren't any broken tiles. I started in the middle of the floor and worked my way towards the edges.
In the spots where there were broken tiles, I just chipped off the tiles and wiped the area clean.
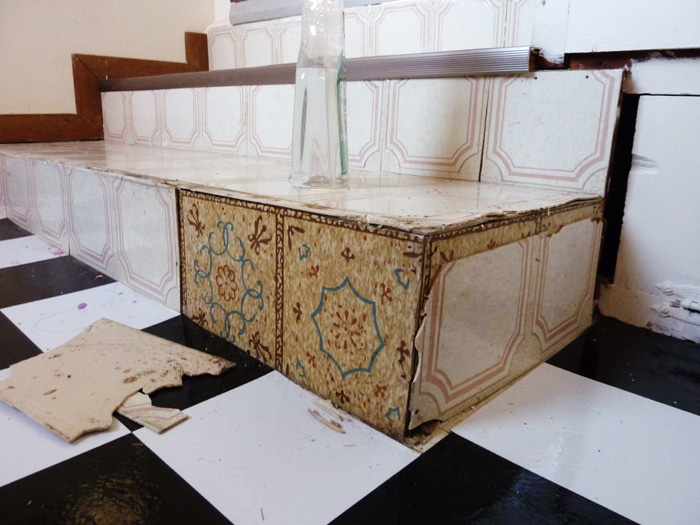
Then I found two layers, and went down to the wood. Since the pre-existing tiles were so old, they were very easy to get rid of and start with a clean surface.

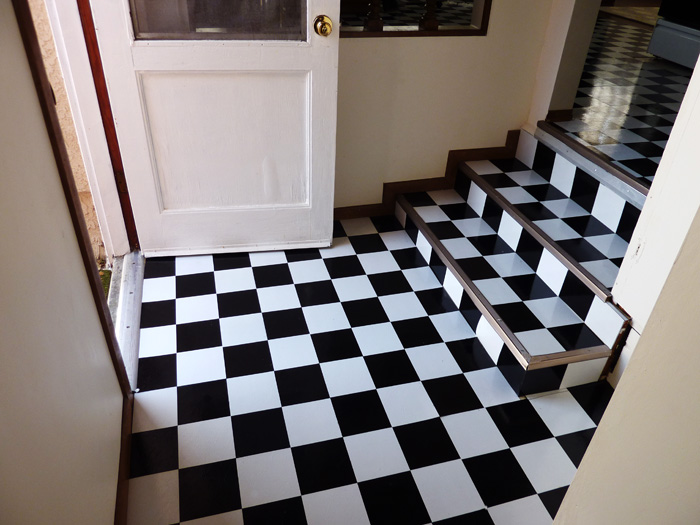
In addition to the vinyl tiles, you'll also need an exacto knife and a ruler to cut the tiles at the edges. When I started the project, I didn't think I'd need a ruler- haha. But after a few very wobbly tile edges, I hunted down our ruler. You don't need to cut most of the tiles- just the ones at the edges and if you have stairs. The stairs were definitely the hardest part!
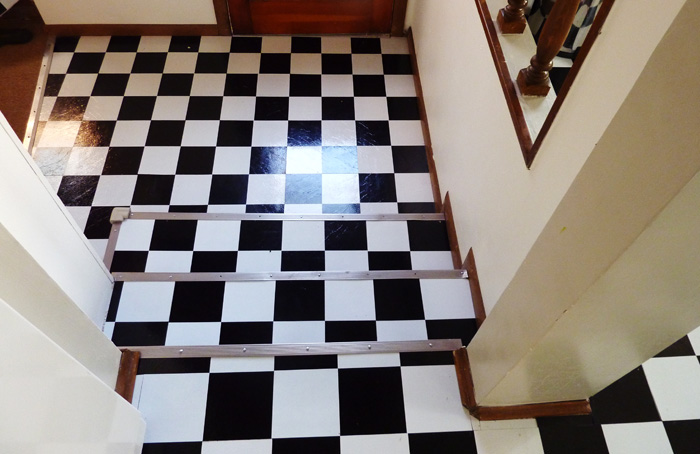
Without further ado, here are the final results of the back hallway/stairs. I finished this whole project during Ginger's naptime over two days...about three hours. It's not perfect, but I am pleased with the results, especially since the whole thing cost me less than $1/square foot.
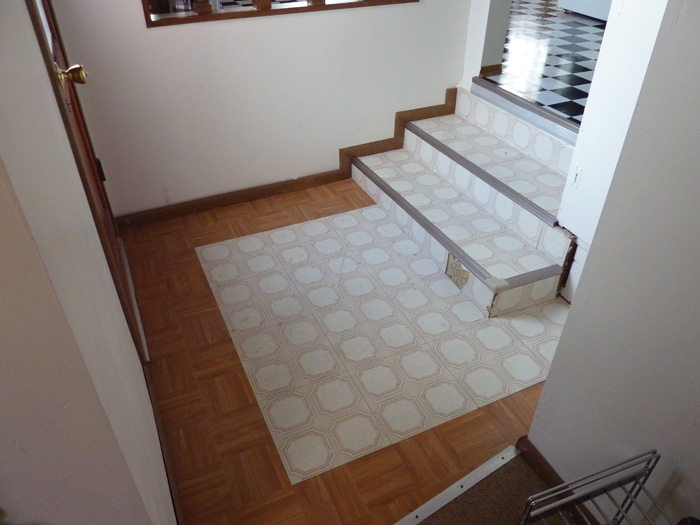
Before:
After:
And now, can I just say...I am so glad it's done!!!!


12 comments:
I am really impressed - these look great! Thanks for the tutorial! It still doesn't make me want to retile, though. :)
WOW! You are quite talented...seriously. I admire your determination...thanks for the information, who knows maybe we'll follow your lead.
I love it! I already talked to Vegas about it and told him that I wanted to do this to our house. Not sure if we'd do black/white but something like it. I sent him the link to your blog and told him we NEEEEEED to do it too. :) <3 the fact you got the stuff on Amazon...that's just awesome! How big is your kitchen??
This would be a great floor to take pictures on!!!! I can just see it now :) Perfect, way to go!
Your new tiles sure made a difference. You SHOULD feel proud. You did a great job, and your floors look GREAT!
be blessed, Michelle
Great job! It's look good!
It looks great and I am sure you feel better having a nice clean, new floor. Way to be resourceful!
Wow! It looks fantastic. Really striking and lovely. Good on you. x
Well done - you did a great job! :)
wow it looks SO good! :]
Looks great, Erika. So glad you are settling in and making it your own.
Wow, Mama. It looks great!!!
Post a Comment